I’ve been obsessively making these little 5 1/2″ crocheted circles.  I’ve just learned to crochet, and it’s SO addictive to make circles!! It’s so fast, and you use up little scraps of yarn, and it is a great way to use up all the odds and ends of hand-spun that have been piling up on my desk.

Circles are so satisfying and beautiful!  These are all started with single crochet, and continue with double crochet, and finished with a round of single crochet.  I’ve got 39 circles done so far, and I think I need at least 88, so I’m not quite to half.  And I really have no idea how I’m going to join them all together, but I’ll get to that eventually!!  Probably with black yarn.  Maybe with little tiny intermediary circles?  It’s hard to say now.

HANDSPUN FINGERLESS GLOVES:

These are really easy, fast and satisfying. They’re a great project that takes very little yarn, which is good for a beginner hand-spinner.

Size:
These were designed to fit a fairly average female hand measuring 7 1/2″ to 8″ around just above the thumb.
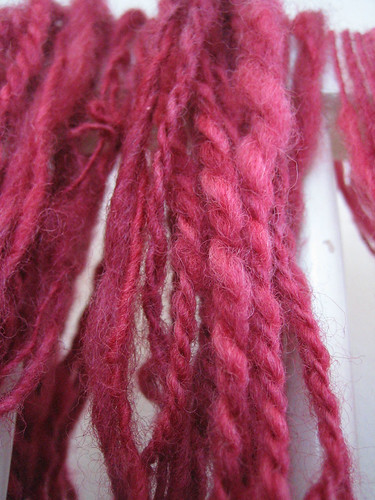
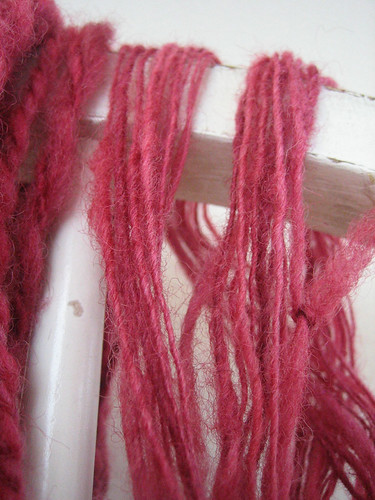
Yarn:
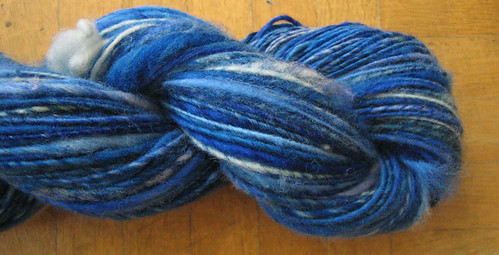
Any yarn that will allow you to make gauge will do. I’ve used a combination drafted hand-spun single that is 11 WPI (wraps per inch), and looks like somewhere between DK and sport weight. I used about 110 yards, but your yardage may vary depending on the row gauge you get.
Gauge:
4.5 sts / inch, 8 rounds / inch in stockinette stitch on US #6 needles (or size to obtain gauge)

I knit these gloves on a long circular, using the magic loop method. They could just as easily be knit on double pointed needles.

HAND:

CO 30 sts.

Place marker at start of round, and work 15 rounds (@2″) in *K2, P1* rib. (30 sts)

Knit 10 rounds knitting all stitches. (30 sts)

To increase for thumb, alternate these 2 rounds 4 times:

Increase round A: K2, inc 1, K to last 2, inc1, K2
Increase round B: Knit

Now there will be 38 sts on the needles.

Now knit around to last 3 sts. Drop live yarn, and using scrap yarn, knit the next 3 stitches (to end of round), then the first 3 stitches of the next round, so you have 6 stitches knitted in the scrap yarn. Then transfer these 6 scrap yarn stitches back onto the left-hand needle, and pick up the live yarn, and knit over these scrap yarn stitches again, using the live yarn. Finish this round knitting straight. (38 sts.)

To decrease after thumb, alternate these 2 rounds 2 times:

Decrease round A: K2tog, Knit to last 2, SSK
Decrease round B: Knit

Now there will be 34 sts on the needles.

work 10 rounds (@ 1 1/2″) in *K2, P1* rib. (34 sts)

Bind off using decrease bind off:
K2tog through back loops, put the stitch created back on LH needle, then K2tog tbl again, … etc.

THUMB:

pull out scrap yarn, and put the 11-12 live loops created onto needles.

1: With new yarn, starting by working across bottom loops (closest to the wrist), knit 6, knit up 3 stitches in gap between bottom and top stitches, then knit across 6 top stitches, then knit up 3 more stitches in gap between top and bottom stitches. (18 sts.)

2: K10, K2tog, SSK, K4 (16 sts)
3: Knit

Knit 7-8 more rounds even, then BO using decrease bind-off (described above).

FINISHING:

Knit second glove same as the first. Weave in ends, block if you find it necessary, and enjoy!!

So after a bit of a break from spinning, I’m back to it!! And I’ve finally made friends with my spinning wheel – that took me a little time, but I think it’ll just get better and better from now on.  These yarns are from hand-dyed polwarth roving.

And here are some more details of the yarns:
1. A 2-ply:

2. Single-ply spun from a variegated roving with blues / greys

3. Single-ply spun from by combination drafting the variegated blue/grey roving with a charcoal grey roving:

There are a few knitters who I’d like to spin some hand-spun up for in time for Christmas, so I’m excited that I’m building up my skills and learning to make nicer and nicer yarns! I bought 2 lbs of the polwarth roving that each of these yarns are spun from, so I’m just going to keep on practicing and practicing with it!

So the apartment now has colour, and I have the most amazing space I’ve ever had in which to adore fibre of all kinds: my craft corner!! OK, it’s more like an alcove, … and lets face it, it basically takes up the entire dining room… but I am overjoyed, to say the least.

So I’ve also been making some stellar progress on the Lady Sweater – I’m done the body, and part-way done one of the arms. I’m VERY excited, as I intend to ACTUALLY FINISH this sweater, and that will make it my first! Hopefully my aran cardigan will follow soon after…

I’ve also been unravelling more thrift-store sweaters, and dyeing roving, and doing a bit of spinning.

The blues/greys roving is polwarth sliver that I got from birkeland bros. here in Vancouver, and hand-dyed using the hot pour method (stovetop). It felted very slightly (not as bad as I have done before, but still not great), so I think I’m going to go back to the oven-dyeing method, which I think is a little safer.

Here are a couple of yarn shots of some spinning tests I’ve done with this roving:

The cushion covers I’ve had on my mind about have been started:

They are made of a recycled angora/wool bulky yarn which I’ve dyed to 3 colors; a bright yellow, light turquoise and dark blue.  They are going to be so very cushy and wonderful!! One problem, though, is I don’t think I’ll have enough yellow yarn to do both sides of a pillow… I have more of the turquoise and blue, however. I’m sure I’ll manage to improvise something, with the size of my stash being what it is….

I’m making up the design up as I go; working a square from the centre out by increasing at 4 points every round. I added a section of seed stitch, which is very attractive in a bulky yarn, and a *yo, P2tog* lacey insert, which creates a very nice little row of dense little ‘purls’, and I recommend trying! This one is almost finished now; a few more rounds and I’ll bind off and start the next. It’s very fast and satisfying knitting, as it grows so quickly!  It is very bulky, and I’m curious to see whether it changes a lot or not very much with blocking; because I seldom knit with this bulky of yarn.

On this spindles, I’ve got some new fibre; alpaca with a bit of wool, which I bought during a visit to Saltspring Island this last weekend, at lovely farm called Bullock Lake Farm. They raise sheep, angora goats (which produce mohair), alpacas, llamas, and have many other creatures. It was an lovely place to visit. I’ll get some pictures of the first bit of spun yarn up soon; it’ll be interesting to learn how best to spin the alpaca; and what kind of yarn best utilizes it’s qualities.

I’ve also gotten back to working on my handspun hat: (which has proved a bit vexing…)

After putting the project aside for some time, I had gotten to the point where I was ready to rip it back (it was too big… 😦 ), and so I did that on Friday night, and then started knitting on it again on the ferry over to Saltspring on Saturday. Then Sunday morning, I realized… &@#$^%!!! it was STILL too big. So I ripped again, farther back this time. I think there’s just something about the way I increased; every round, in 6 places… that makes it just balloon, even after I start knitting completely straight. But it IS beautiful, in the sort of way that kind of hurts your eyes with its clashiness!

Well I’m farther along now than is shown in the picture, and it STILL seems like it’ll be a bit too big, but there’s no way I’m going to rip it out again; if it doesn’t fit quite right when it’s finished, I’ll just felt it to size.

This is a little scarf that I’m working on with the yarn I hand spun from hand-dyed polwarth roving [see dyeing in previous post here].

It is a very satisfying little project, perfect for the bus and skytrain, and yes, nerdiness abounds, I’ve even begun to knit while walking, I’m embarrassed to admit. It’s just such a great way to relax after a hard day of work!

It’s only 18 stitches wide, knit on US#7 (4.5mm) needles, and the pattern is one that uses multiple wraps to create elongated stitches; it’s a really easy way to make an open, lacy fabric. I really love it as a way to show off this yarn, because the color shifts turn into fairly wide stripes, and the thick/thin inconsistency of the yarn looks nice. I’m not sure if I should block it after it’s done or not…

I started out knitting simple uniform rows 8 row repeat: <K 3 rows, then 1 row wrapping each stitch twice, then K3 more rows, then 1 row wrapping each stitch 3 times>

Then I got bored of that, so I switched to a pattern which creates ‘open’ rows that are shaped like eyes and hourglasses:

R 1-3: K all sts
R 4: K2, (Knit, wrapping twice) 2 times, (Knit, wrapping 3 times) 3 times, (Knit, wrapping 4 times) 4 times, (Knit, wrapping 3 times) 3 times, (Knit, wrapping twice) 2 times, K2 <18 sts total>
R 4-7: K all sts
R8: (Knit, wrapping 4 times) 2 times, (Knit, wrapping 3 times) 2 times, (Knit, wrapping twice) 3 times, K4, (Knit, wrapping twice) 3 times, (Knit, wrapping 3 times) 2 times, (Knit, wrapping 4 times) 2 times
REPEAT THESE 8 ROWS

I’m very pleased with the result – I’m 2/3rds of the way through my 170 yards of yarn, and it will be very

lovely when it’s done!


I’ve started a pi shawl, that I intend to eventually be blanket-sized. I’ve wanted to start a GIGANTIC project like this for some time, and I finally cast on. The yarn is a recycled 100% merino which is absolutely lovely; it’s about DK weight or so; and I’m knitting with US#6 needles. I was mostly inspired by the pi shawl blanket that Brooklyn Tweed made; once I saw it, it stuck in my mind and eventually I had to make one! The pattern is by Elizabeth Zimmerman.

On the rawer fiber front, I’ve been up to my elbows in dye, and the results are these 3 colorways of polwarth roving, all dried out and ready to spin. And on the spindle are some initial tests of how the colors might spin up if I draft them together. I am especially happy with the reds/pinks/mauves/browns/blacks I achieved in one of the rovings. The others didn’t really turn out as planned at all; the BRIGHT orange was supposed to be mostly deep reds with a bit of orange, and the intense blue/green/yellow roving was to be a fairly consistent turquoise… well that didn’t happen. But the orange is very exciting, and the blue-greens will likely make a beautiful fabric once spun.

I’ve just spun enough yarn to actually MAKE something!  The yarn is spun from a polwarth roving that I hand-dyed in my dyepot in the oven. I actually wasn’t happy at all with the result of the dyeing – I hadn’t intended any white spots to remain in the roving, and in fact there was quite a bit of white in the finished product. But as with many things that I work on, it has grown on me, and I love the final product. It reminds me of a blustery day sailing, with whitecaps and spray flying off a brilliant blue ocean under deep blue sunny skies.

Process shots: [click for larger image]

Roving — > spun single on niddy-noddy — > yarn in skein form — > balls — > knit garment!

I spun approximately 170 yds from around 55 grams of roving. It’s pretty inconsistent & thick & thin. So now I need to decide on a project; I’m thinking either scarf of toque will be most forgiving of the thick-thin nature of the yarn; plus they’re small. I’ve got Barbara Walker’s A Treasury of Knitting Patterns out of the library, so I’m trying to find an inspiring stitch pattern that will work with thick/thin. I’ll be checking out ravelry too…

This is some of my first handspun! I spun it from fairly coarse wool roving, which I hand-dyed (you can see the roving in the dyeing process at left. It is 11-12 WPI and 2-ply. I have to eventually learn to spin more finely, to achieve a good sock-weight yarn.

This below is single-ply lace / fingering weight, and another 2-ply. I just finished spinning the 100 grams of this roving, and so I bought 1 lb of softer merino roving. My next project will be to spin enough to knit a project – but I’m not sure yet what; socks? a toque? a scarf? maybe even a sweater, if I spin a fairly bulky yarn? I also will be starting to learn to spin on my mom’s old wheel, so I’ll find out how quickly that will work.

OK, just to explain, I say ‘spindster’ because I’m spinning with a spinDle, not a wheel (well, not yet, anyways). I want to learn on the spindle, then graduate to the wheel my mom gave me (she bought it as a kit and put it together back before I was born).

So after my outing to the wool shop, the next day I went to Home Depot, which is, most conveniently, just across the street from where I work. There I found bits and pieces of things that I thought might combine to become a drop spindle. This adventure was inspired by another Emily of the web, author of ‘Not Another Knitblog!’, who has made some beautiful drop spindles from found objects.

So a little dowelling and hardware later, I had a couple of spindles. The first, made with big heavy washers, is not as effective as the second, made of what I think was a cabinet door pull. But I used them both in the creation of my first yarns!